Wednesday, July 31, 2013

Simplicity 2373 - My Wedding Box Dress


I'm continuing to work hard on organizing and decorating my sewing room with lots of sewing in between.  Here you can get a peek at what my cabinets look like.  The painted box on the desk is a "wedding box" I received when I got married and it's filled with wedding cards and our guest book.  As I was planning my new room, one of my thoughts was to paint this box and give it a fresh start but as I was moving things around in the room I realized I still love it....23 years later .... 80's tole painting and all.  When I put the dress on the mannequin and took the picture I wasn't thinking about the box but now that I look at it they are a match made in heaven.  So here is a review of Simplicity 2373, my"Wedding Box Dress".

I've made this two times before, one for me and one for my daughter and this one is for me.  Because the dress design is simple it's easy to change up and be creative. 


I used the "Boho Border" from Urban Threads (I love their designs) on the bodice, lengthened the bodice 2" and distributed the gathers on the skirt evenly instead of concentrating the gathers in the front like the pattern suggests.  I bought the fabric at Mood on my trip to New York and I'm really happy with the finished project.


Here's my review at patternreview.com:

Description:
View A sundress with empire waist, shoulder straps and softly gathered skirt.
Pattern Sizing:
I made a size 12.
Did it look like the photo/drawing on the pattern envelope once you were done sewing with it?
Yes
Were the instructions easy to follow?
Yes.
What did you particularly like or dislike about the pattern?
This dress went together so easily. My favorite part about the pattern itself is the shaped strap. It makes the shoulder strap really stay up on the shoulder so I'm sure I'll use that pattern piece for other dresses. This was a fun dress to make.
Fabric Used:
I made the dress from a 100% cotton lightweight stripe.
Pattern alterations or any design changes you made:
I embroidered the bodice front and lengthened the bodice 2" to accommodate the embroidery.
Would you sew it again? Would you recommend it to others?
I've made it a few times.  It's a really easy dress to wear.
Conclusion:
This is a great pattern and a great dress for the summer.


Sunday, July 28, 2013

You Can Go Your Own Way Maxi Dress


 Since the heat spell here continues,  I'm desperate to find the perfect maxi dress pattern.  I've had this double gauze for quite some time so I decided maxi dress, hot weather and gauze could be a match made in heaven....or at in least the 70's.  I love the dress and when I put it on I want to throw on a pair of wedges and sing Fleetwood Mac.  It really feels like the 70's.....but in a good way.  Instead of the casing for elastic at the top of the dress I used elastic thread to make a smocked top (like I did on this project.)  So here is my review of McCall's 6558 on Pattern Review:

Pattern Description:

Pullover tops and dresses have elasticized neck/raised (seamed) waist, and narrow hem

Pattern Sizing:

I made a size 12

Did it look like the photo/drawing on the pattern envelope once you were done sewing with it?

Yes

Were the instructions easy to follow?

Yes

What did you particularly like or dislike about the pattern?

This is a simple style that can be changed very easily

Fabric Used:

Pink, red and cream striped double gauze

Pattern alterations or any design changes you made:

I ended up making a few changes:  Instead of making a casing I smocked the top with elastic thread, I did a rolled hem on the upper edge and made halter straps.

Would you sew it again? Would you recommend it to others?

Yes, I'll make this again.  It's so easy and comfortable.


Sunday, July 21, 2013

I'm a Stitchin' Fool


I recently got a "new to me" embroidery machine and I'm so excited.  In celebration of this life altering event I made this cheery bunting.  I embroidered each of the triangles on my Janome 10000 using this embroidery design I found at Embroidery Library.

Each of the triangles took about an hour to stitch out (including pauses for changing thread and folding laundry) and sewing all of the triangles together took another hour.  It makes me happy to look at but I better enjoy it now because it's a gift for someone dear and will be leaving my house soon.

I've been frequenting Embroidery Library often lately and the possibilities seem endless.  They have a "Projects" section offering full instructions for finished projects using their designs (I got the idea for the bunting there). If you go on the site be sure to put yourself on the email list because they send specials to my inbox quite often.

I've been stitching away on my machine and will share soon.

Sunday, July 14, 2013

"Pull 'Er Up" Cover Up


I bought this inexpensive knit a few months ago.  I don't know what came over me but it was soft and I loved the colors even though it is not a typical print for me.  I washed, dried, folded, and matched the print and found I really didn't have much fabric left to work with.  So I decided to make a little beach cover up.  I'm sure my inspiration had something to do the 96 degree days we've been having.

Here's how I did it:


Supplies:
  • 32" length of approx. 60" knit fabric (my width ended up being 56")
  • Thread to match
  • Elastic thread
  • Border Guide Foot (optional but helpful)
  • Good and Plenty (optional but also helpful)


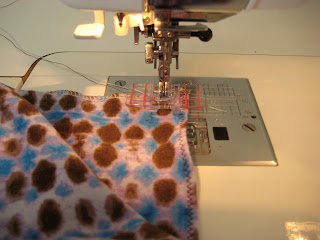
  • Hem both the top and bottom of fabric
  • Sew a row of elastic from the right side about 1/2" from top 
  • Continue sewing rows of elastic until desired bodice shape (mine was about 12 rows)
  • Sew the side seam 


 Here she is! Where's the beach?