Wednesday, February 18, 2015

The 15-Minute Flannel


I'm glad to be back to Fabricmart's blog with my new cozy flannel.  Sewholic's latest PDF pattern, the Granville Shirt, is the perfect fitted shirt pattern to make a classic flannel shirt while still looking like a girl.  I used this soft plaid 100% cotton flannel from Fabricmart.  It's lightweight and dreamy to wear but it also holds it's shape like a good quality flannel should.


So...it didn't actually take me 15 minutes to make this shirt so why call it the 15 minute flannel, you ask?  Time being what it is in my life right now, I didn't have the opportunity to set aside large blocks of sewing time so I decided to make this shirt in short, 15-20 minute sewing spurts.


A shirt like this, with lots of details, is the perfect project to break up into smaller parts.  I found sewing this way made me take my time and focus on each part to be sure everything was done right.


In just 15 minutes or so I could do quite a few separate things:  apply interfacing and rethread the serger, add pockets and front darts, attach collar band and make collar, make sleeve plackets and sew side seams and set in sleeves.


Sewholic's patterns are geared toward the pear shaped figure which is quite refreshing for the sewing community.  I wouldn't consider myself a pear shape, so I took out some of the hip curve in the side seam.  You can see here it's pretty curvy!  The instructions have lots of drawings and well written step by step instructions which lends itself to sewing in small time increments.


The pattern uses mostly traditional construction techniques aside from the collar.  I was tempted to use my usual collar application but I decided to stick right with the instructions (I know...yay for me for following directions).  The collar band and collar band facing are attached to the neckline of the shirt first (like the photo above), then the collar is attached to the band.  This is the first time I've ever seen this in a collar and I had to read it a few times to get it.  The collar band and facing are then stitched, right sides together from the tip just to where the collar starts.  After turning the collar band right sides out, the collar is sewn to the band and slipped in.  It worked great and it made topstitching a breeze.


I made three small changes to the shirt.  First, I cut the pocket, sleeve cuff and back yoke on the bias, second, I made the collar band facing and cuff facing out of contrasting fabric (polka dots because what could be better?) and lastly, I used pearl snaps instead of buttons and that made it easy and fast.
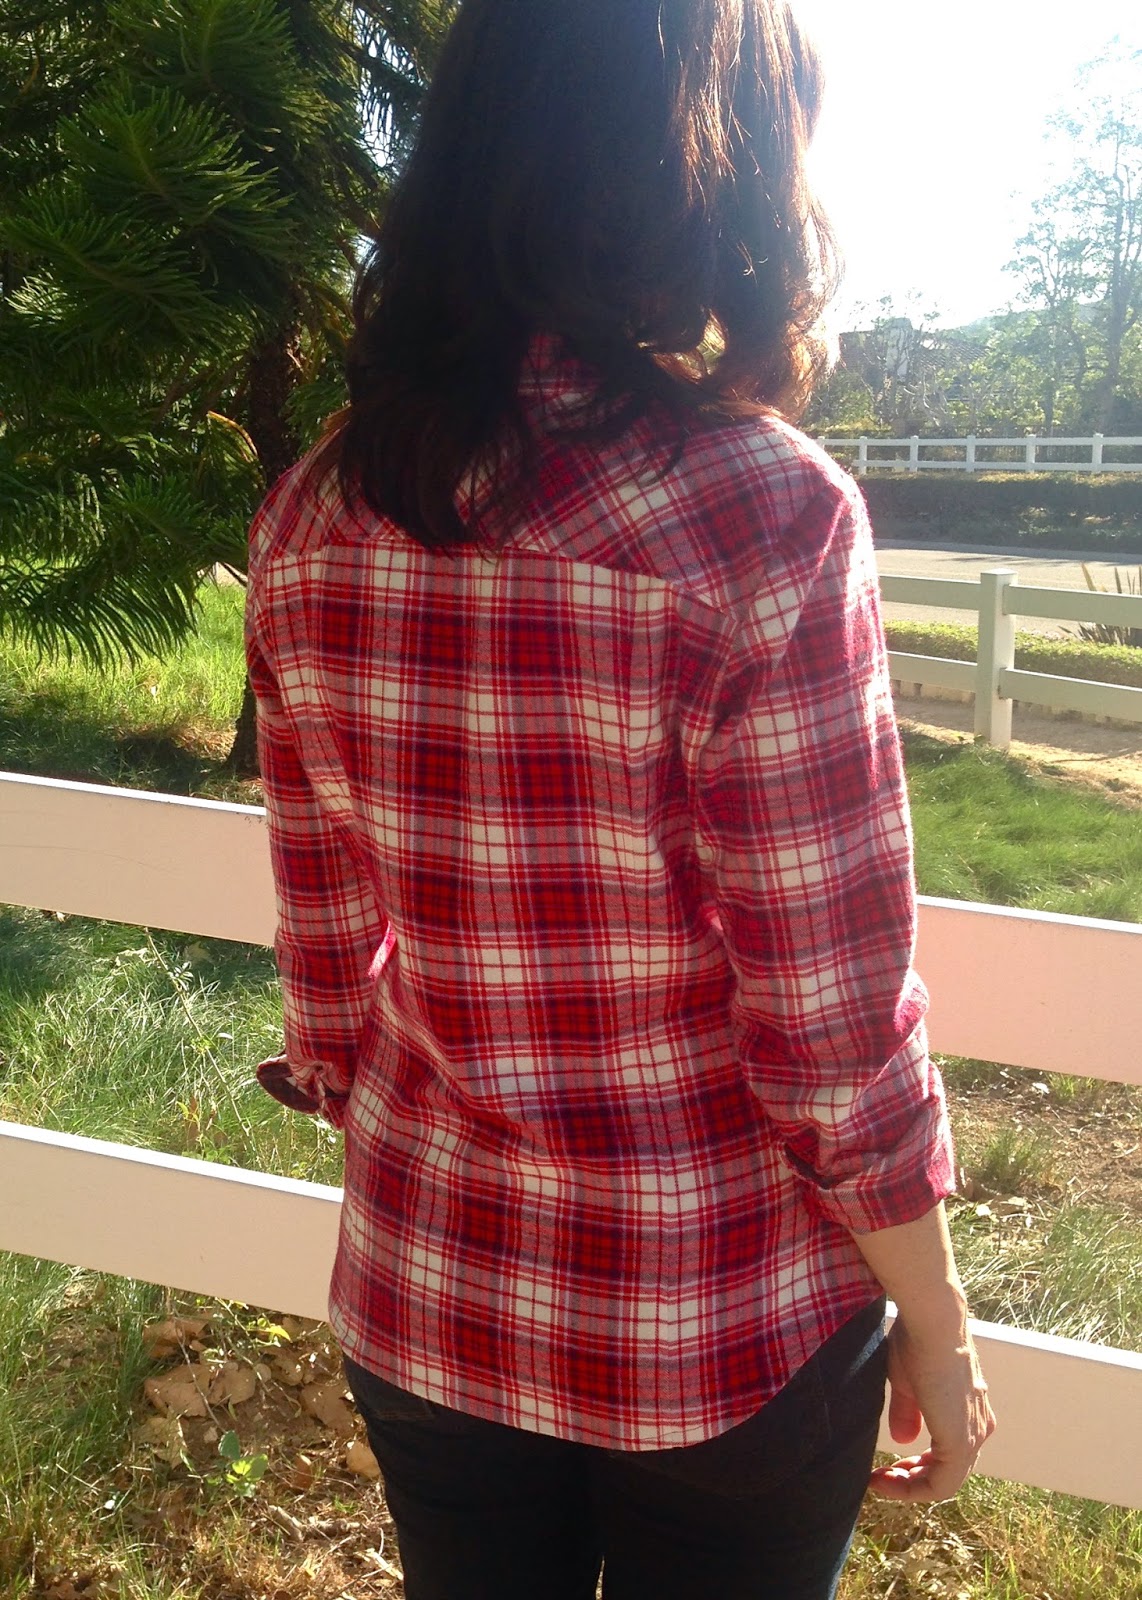

This Granville pattern is a perfect wardrobe staple  It makes up great in casual flannel but it would be beautiful in a floral voile or classic in crisp white broadcloth.  I'm sure I'll be making it again soon.


This is likely my last winter project and now I'm off to thinking about spring sewing.  What's next for all of you?


My photographer is back from college for the weekend.  Isn't she cute!


Monday, February 16, 2015

Ooooo...I love Valentine's Day!


Some cute little Valentine's Day pouches I made with metal zippers.  I hope you had a Happy Valentines Day!

Tuesday, February 3, 2015


January was a great time to start a little spring cleaning and dream about upcoming sewing projects.  I have one more winter project in the works and then it's on to spring.  Although most of my projects begin with a pattern or fabric I absolutely can't live without, I'd like to spend more time on projects that enhance the versatility of my wardrobe.  I'm inspired by Colette's Wardrobe Architect, a series of blog posts containing style therapy and practical ways to focus sewing projects, all while looking and feeling better about yourself.   Although I haven't completed all of the exercises, I did find a lot of value January's exercise, choosing core patterns.

In choosing core patterns that both fit my body type and lifestyle, I found I chose many of my "tried and true" patterns.  These are the patterns I make and wear over and over because they are good styles for me and I have the fit down pat.  I'd like to have a few more of these TNT's so I did some searching and posted these ideas on a Pinterest board.


One of the patterns I came across is a "new to me" pattern, New Look 6194, that I have passed over many times.  I saw a version of this top by on Kollabora by Fruitylily (she's the cutest) that made me to take a second look.  I often wear sleeveless tops because so much of the year it's hot where I live so this will be a great addition to my TNT's. 


I visited the Rebecca Taylor website and found 3 amazing tops I could make from this one pattern.  The first would be beautiful made in cream silk crepe and embellished with black lace.  Simple and feminine without being frilly.


By changing the neckline from boat neck to a v-neck, I would have a completely different blouse.  Made up in a rayon challis with trim at the neck, this is a versatile wardrobe option. 


The third blouse would be lovely in a bright silk charmeuse and chiffon. Paired with jeans,  it makes it easy to look put together.  Mmmmm.

Wardrobe Architect is inspiring me to look at patterns as more of a canvas for creativity.

Are there any other Wardrobe Architecters out there?

Wednesday, January 21, 2015

Fabricista Jacket - Boucle Baby


Happy New Year Friends!  I'm happy to get my Fabricmart Fabricista year (Thanks Fabricmart!)  off to a good start with a classic boucle jacket. It's a timeless style, classic fabric and beautiful color!


I started with New Look pattern 6028 view A and chose Fabricmart's soft green, black and white boucle suiting, similar to the type of fabric used in the pattern photo (the fabric also comes in this pretty pink, yum).  I used this Maggy London black satin for the lining.  So luxurious!


I didn't make any style changes or alterations to the pattern (don't you love when you get a pattern like that?)  but I changed the lining. The jacket shell pattern and the lining pattern are the same, meaning, when you sew the lining and jacket together, the lining fabric is right up to the outer edge of the jacket.  So if the jacket comes open or lifts up, you would see the lining right at the edge.  I wanted a more traditional lining that included a facing all the way around the neckline and a hem.  It's an easy remedy:


1) I added 1" to the hem of the jacket shell (there was only a 5/8" seam allowance).

2) I cut the jacket front facing out of the shell fabric.

3) I cut a back neck facing out of the shell fabric and attached it to lining.


This boucle is great to work with because it has some natural give which makes sewing curves and easing in sleeves a breeze.  I added a sleeve head to the sleeve to give the jacket additional structure.  Here's how I made them (it's so easy you don't need to buy them):


Trace the sleeve head onto lightweight fleece, from dot to dot.


Draw a line from dot to dot.


Fold along the line and cut out the curve.


Sew the sleeve head onto the seam allowance of the sleeve, matching raw edges of fleece and sleeve.  Stitch just inside stitching line (4/8").  Press all seams toward the sleeve.


The sleeve on the left has a sleeve head and the one on the right doesn't.  You can see what a big difference this tiny piece of fleece makes.  The one on the left looks much better, it even makes the side of the jacket hang more smoothly.  And this is all before shoulder pads!


And now for the fun part....the trim!  The outer trim on the jacket is simply bias strips of fabric gathered down the center.  I used the gathering foot on my machine, set the tension to the tightest, used the longest stitch length and stitched until everything was gathered.  I put the trim on with a straight stitch right over the gathering line.  Super easy....and pretty!


I had some leftover strips I sewed into a continuous circle, put a button on top of the raw edges and made a flower.  I'm feeling pretty tricky right now! 


I think now it's time to make this jacket in pink!

What's next for you?

Check out the blog post for this jacket and lots more at Fabricmart's blog.

Here's my Patternreview.com review.

Diane


Friday, January 16, 2015

Happy New Year and Simplicity 1430

Happy New Year!  Yes, I know I'm a little late.  I wasn't quite ready for the new year just yet but it came anyway.  I usually have a detailed list of what I'd like to accomplish for year including both sewing and personal goals, but this year I have only two resolutions:

1. Make my first PDF pattern to share with my sewist friends (that's you guys!)
2. Learn to crochet.

I'm very happy to say I've started both!  More updates on the pattern will be coming (I'll probably be making a pattern tester call very soon) and trust me, no one wants to see any of my crochet projects...at least so far.  Uh-hem...


I did a lot of Christmas gift sewing over the holidays so it's nice to get back in the swing of garment sewing.  I've completed two projects so far this year, a jacket and this blouse.  I bought Simplicity 1430 when it first came out and never got around to making it until now.  I'm really glad I did.  It's quick to put together and even though it's a simple shell, it's still really pretty.


I'm not really sure where this fabric came from.  I found it in the donation bag at work and I decided to bring it home and give it some life.  It's a polyester (I wasn't lucky enough to find a silk in the donation bag) crepe with the perfect drape for the pattern.

It has only a few seams and a band at the top.  Since the pieces for the band are quite small and the fabric is very squwidgy, I found it easier and more accurate to fuse knit interfacing to the wrong side of the fabric BEFORE I cut out the pieces.  It eliminates the need to cut out the fabric and interfacing separately and then trying to line them up on the ironing board before fusing.


After seaming the front and back bands together, I serged all the way around the outer edge, as a guide, to make it easy to fold and press the small 1/4" hem it calls for. 


I love how clean it turned out!  And so much less frustrating because of the serge stitch.


I finished the band with a topstitch using my ditch-foot/blind hemming foot as the guide (I use this foot all the time) to be sure it was even all the way around.


I can't wait to wear it!

Any New Year sewing resolutions?

Wednesday, December 17, 2014

Fabricmart Fabricista - Frankenpattern Dress


Although the mention of Frankenstein conjures up scary images of Igor and bad posture, Franken-patterns are quite different.  Sewists have coined the term to describe combining more than one sewing pattern until a new look materializes.  Ahhh, the joy of creating something new and unique. “It’s Alive!”


It’s time for a winter dress and I’ve been drooling over this fabric for quite some time, both because I love the print and because a double crepe can be difficult to find.  It has a pebble like texture, beautiful drape and “mechanical” stretch, meaning that although it is a woven fabric without lycra, it still has a slight crosswise give.  The stretch makes this fabric easy to sew and even more comfortable to wear.


The print is sophisticated but still really fun and lends itself to a simple style. The skater dress silhouette is quite popular right now and I thought a modified version would be perfect.  There are plenty of skater dress patterns out there but I couldn’t find one suitable for a woven fabric, therefore, I decided a Franken-pattern was in order.  

For the bodice, I used New Look 6144 View B.  I’ve used this pattern before and love the fit.  I cut the pattern 1" above the waistline so the skirt would sit just above the waist and made pleats at the neckline instead of the darts the pattern called for.  


For the skirt, I wanted to dirndl style skirt, not too full, not many seams, so I could make the best use of the print.  I used Simplicity 1354 for the skirt, omitted the pockets and left everything else the same.


What’s a cute dress without a bag to go with it?  Simplicity pattern 1387 was the basis for the shape of the bag, but I changed the handles, closure, hardware and lining to get the bag that I wanted.


The top of the bag is lightbeige twill and black wool suiting makes up the bottom and handle.  To round out the menswear feel of the twill and wool, I lined it in a classic striped shirting and trimmed it with “pleather”.  The pattern doesn’t have any pockets in the lining, so I added a zip pocket on one side and sectioned pockets with bias trim on the other.


I’m so happy with my Franken-pattern dress and my coordinating bag makes me feel like I really have it together.  Thanks Dr. Frankenstein.  And thank you Fabricmart!


Saturday, December 13, 2014

Christmas Sewing

Lots of Christmas sewing going on around here.  Make up bags, journal covers, lanyards, sweatshirts and even a cape for a sweet little girl I know is on the way.

I made this set for my son's (very favorite) teacher:


And I made these for my girlfriends:


More Christmas goods are on the way....