Showing posts with label Indie Patterns. Show all posts

Wednesday, January 20, 2016

I Have Nothing to Wear...It With


I did a serious and long overdue closet clean out and found that I have some holes in my wardrobe (not a single white shirt), items I love (including accessories) that don't go with anything and lots of pretty colorful tops.  So guess what I made?  A new pretty colorful top!  Admittedly I do need some basics but this turns out to be the perfect top for right now because I used fabric from my stash, it was really easy AND it goes with one of those accessories "that don't go with anything".


I bought this woven stripe cotton fabric in Northern California (I want to say it's a Kaffe Fassett but I could be mistaken)  It's soft, lightweight and in tones of rust with touches of gray.  I have very little in the way of earth tones in my closet so it feels like something really new and different.


I used my Blue Dot Margo Blouse pattern view B but left off the placket and added reverse bobbin work along the yoke.  I've used this technique before (it's dead simple, I have a little tutorial here) and it takes this little earthy tunic from basic to a little artsy.


I paired it with this long lost necklace in my closet that I never wear.  It has beautiful glass beads and a silver pocket style watch as the pendant.  Finally I have something to wear....it with!


Did any of you do closet clean outs for the new year?

Diane


Wednesday, November 11, 2015

I Have Nothing To Wear.....It With


If I had a dime for every time I went in my closet, pulled out something cute and said to myself "I love this but I have nothing to wear it with" I'd be a wealthy woman.  Okay, well maybe not wealthy but I sure would have more money to buy more fabric.  So I've decided to pair up one of these "lonely" items with a handmade one and bring it out of the closet.


Typically I go for the same practical handbag in a neutral color (and yes, usually it desperately needs to be cleaned out) but a colorful bag that's a little impractical can sure make me feel like a girl.  This modified "hobo" bag made from super soft mauve leather and silver hardware is one such bag.  As lovely as it is, it's been sitting on my closet shelf for quite some time.


When I found this beautiful Liberty of London silk at Fabricland, my local fabric store, I heard angels sing.  I decided to splurge and as it turns out, this fabric is perfect for my bag.  That's a win, win.


I used View B of the Margo Blouse pattern in a size medium.  I made the pattern with no changes (shocking, I know) and finished it with 3 vintage buttons that I had in my stash.  This blouse has turned out to be really versatile for me.  It looks casual with jeans but I also wear it tucked into a navy skirt and it looks very "business-y" for work.  Throw on my mauve bag and I look like I know what I'm doing.


I have a few other "nothing to wear it with" pieces in my closet.  Which one should I tackle next?


Thursday, October 29, 2015

My New Granville


I finished my new Sewaholic Granville!  But what is it with me and red Granville's you ask? I've made two and they both are red, what gives?  Who knows, but I love them!


I made this version in a red and white micro stripe stretch shirting I purchased in NY.  I trimmed the placket with a red, navy and cream twill tape I picked up at M and J Trimmings.  It's one of those trims that's so precious I almost didn't want to use it....but I'm glad I did.


I made this Granville just like I did the first one and this time the "modified burrito" collar construction was so much easier.  Have you tried it yet?  I'm pretty sure I'll never put a collar band on the old way again.  Sewaholic has a good tutorial here.


The made the cuff about 1" narrower than the pattern to make the sleeve roll up better and I straightened the side seam a little bit to take out some of the curve I didn't need.


And now for the buttons.  I have so many white vintage buttons it's almost scary.  It took me more time to sort through the buttons for a set that matched (or close enough) than it did to make the buttonholes.  Seriously, I need to give some of these away!


When I have a project with buttons, I only use the pattern to mark where the buttonholes go, not the buttons.  After I put the buttonholes in, I then line up the fronts and mark the button placement.  This insures the buttons are perfectly lined up.  Here's how I do it:


I lay the right front over the left front and pin them together.


I mark the button placement with a fabric marker.  Now, everything's all lined up!


I'm sure I'll make this pattern again....just not another red one....probably.

It turns out, red is really tough to photograph.  The shirt is more of a cherry red but some of the photos look neon and some look tomato (and my nose really looks tomato red since I'm getting a cold!)  Does anyone out there use a timer to take blog photos?  If so, what do you use?  I have the most patient husband ever but I really don't want to put him through snapping photos anymore.  Help!


Wednesday, October 14, 2015

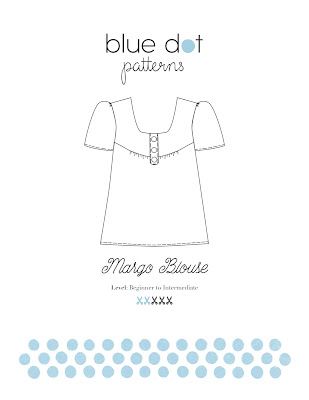
Margo Blouse - New Pattern Release!


I'm happy to introduce my new pattern, the Margo Blouse!


The Margo Blouse is a women's set in sleeve blouse in two views. View A has short sleeves and a straight hem and View B has 3/4 length sleeves with elastic and a curved hem.  This pattern is versatile enough to be a cool summer top to wear with shorts or an elegant evening tunic.


Margo is designed for the beginning/intermediate sewist and comes with easy to follow instructions complete with detailed drawings.
Modern quilting cottons, chambray, lace, silk crepe and flannel would all be good choices for this top.   You can even change it up by using different fabrics on the yoke, placket and body of the blouse.
Here's what you'll need:

Fabric Requirements:

View A:  44"/45" Fabric - 2 yards          58"/60" Fabric - 1 1/3 yards
View B:  44"/45" Fabric - 2 1/2 yards    58"/60" Fabric - 1 1/2 yards

For all views: thread, three 3/4" buttons.  
For view B: 3/4 yard of 3/8" elastic.

Visit the Blue Dot Etsy Shop or Website.

I hope you enjoy sewing this pattern as much as I've enjoyed making it.  I'd love to see your finished projects!


Happy Sewing my friends!

Monday, October 12, 2015

Sneak Peek - New Pattern Release Giveaway!!!


I've been feverishly working on a new Blue Dot PDF pattern and I'm happy to say she will be released Wednesday, October 14th! 

Today, because I'm so excited, I'M GIVING AWAY 5 COPIES OF THE PATTERN before it's released.  Just leave a comment at the end of this post and I will be picking the winners at random.  


Visit my Etsy or website to check out all of the patterns from Blue Dot.


Thursday, October 1, 2015

Put Together a PDF Pattern....The Fast Way!


There's nothing like the satisfaction of finding the perfect pattern for that fabric and then realizing you can have it immediately by printing it at home.  You find it, buy it, print it and can be sewing in a few minutes!  But... taping them together isn't quite as fun.  Today I'm sharing the fastest way I've found to tape them together so you can be on your merry (sewing) way.

Here's what you'll need:
PDF pattern
Rotary cutter
Ruler
Rotary cutting mat
Clear tape (matte finish)

Step 1:  Test Square (don't skip this step)
Print the test square provided on the pattern and verify that it's the correct size.  In my example, the test square must be 4".  If your test square size is incorrect, be sure to go back and make print setting adjustments (setting the printer to "actual" size is the common fix) until it's right on.  Once everything is correct, print your pattern.


Step 2:
Place ruler along the left line of pattern frame and cut off margin using a rotary cutter.  Do the same for the bottom margin.  

 Be sure to leave the top and right sides untouched.  Your pattern pieces should look like this:


Step 3:  Tape pages together
Align numbers or markings on the pattern and tape.  Because you cut the left margins off already, you simply need to slide the left page under the right.  Tape pages together in rows from left to right.


In this example, Blue Dot patterns have both a number and a circle to help make alignment accurate.  I tape at all alignment marks and pattern lines to assure my pattern stays together.  I use "matte" clear tape because it allows me to use a pencil or pen to make any fitting adjustments.


 Step 4:  Tape rows together from top to bottom.


That's it!  The rotary cutter saves so much time!
I hope this helps you enjoy your PDF patterns!

Friday, September 25, 2015

Georgia Sew Along - Sew It Up in Two Hours!


I'm happy to bring you the Georgia Top Sew Along!


 The Georgia Top is a versatile knit top pattern you will make over and over.  She's gonna be your best friend AND you can make her in under TWO hours! Here's a sew along with full color photos to help guide you through and you'll learn everything you need to know to get begin sewing on knits.   The Georgia PDF pattern is on sale for just $6 through the end of September so grab your copy and make yourself make a new sweatshirt!

Blue Dot instructions are fully illustrated and divided into areas of construction or steps.  Working on one area at a time takes the mystery out of garment construction and helps you learn how to sew.  For example, when you finish the "Neckline" construction, you'll know how to construct a neckline on any basic t-shirt pattern, with or without instructions.

Georgia has 4 major steps: Bands, Neckline, Body and Finishing  

4 steps....easy peasy, right?
Okay....are you ready to have a new top in under two hours?  


Here's what you'll need:

  • Georgia PDF Pattern View A by Blue Dot (printed and taped together).
  • Knit fabric (1 3/4 yards of 60" fabric)
  • Basic notions: scissors, pins, measuring tape, etc
  • Ball point machine needle (for knits).
  • A chick movie that's under 2 hours (because you'll be done before then!)
  • Optional for straight hem:  twin needle for knits, spray starch.


Some things you should know before we get started (and before you sew with any knits):

You don't need a serger to sew with knits.  Certainly it can make it easier and faster but I'm here to tell you, and more importantly show you, how to do it with your regular machine. All knits are different so every time I start a project I make a test swatch to see which stitch works with my fabric.  After putting a ball point needle in my machine I try different stitches:
  1. The top stitch is the knit stitch built into my machine (#6 on the left).  
  2. The middle stitch is a basic zigzag 2.0 wide and 1.5 long.
  3. The bottom stitch is the overcast stitch built into my machine (#4 on the right).
The overcast stitch gave me all of the stretch and recovery a serger would so that's the stitch I went with.


Pattern layout and cutting:

 I decided to make my Georgia a tunic length so I added 3" to the hem of the front and back pattern pieces and hem the bottom instead of adding a waistband.


I used a navy and white stripe mystery knit I bought on my trip to the NY fabric district. It's the weight of a ponte knit with great recovery (it bounces back to shape after it's stretched).  Because I used a stripe I took the time to line up the stripes before I laid the pattern pieces on the fabric (see below). 


Pin your pieces down (using the layout in the pattern), cut them out and mark the notches with a 1/4" clip from your scissors at each notch, center front and center back. 

Notes about sewing:

All seam allowances are 1/2". 

RST (means "right sides together" or pretty sides of the fabric facing each other).

Now you're ready....here we go!


Step 1:  Bands

With RST, stitch armbands and neckband ends together forming a circle.  Press bands in half.


Step 2: Neckline

With RST, stitch front to back at shoulders.  Press seam toward the back.


With RST, pin neckband to neckline matching center fronts, center backs and notches to shoulders.  


Stitch in place, stretching neckband to fit. 

Tip: To make your neckband even, be sure the distance between the left edge of your foot and the fold of your neckband are equal. 


Step 3: Body and Sleeves

With RST, stitch front to back at side seams.  Press seam toward the back.


With RST, pin armband to arm, matching notches and underarm seams.  Stitch in place stretching armbands to fit.


Step 4: Finishing (yes you're already there!)

I'm leaving the waistband off and opting for a straight hem.  If you add the band it attaches the same way the neckline did.  Most people are afraid of hemming knits but follow these steps and you will be an expert: 

  • Fold up desired hem width (mine is 3/4").
  • Spray the hem with spray starch and press (this keeps your knit from moving out of place).

  • Place the twin needle in your machine.
  • Put two thread sources at the top of your machine (most machines come with an extra spool holder you can attach to the machine and an extra bobbin works great as the second source of thread).
  • Treat both threads as one and thread the machine.  Put one thread through each eye of the needle.
  • From the right side of the fabric, stitch hem in place.
It looks just like a store bought top!


With your twin needle, topstitch the neckline 1/8" from the neck band.  Repeat for the armband.


It looks great!


That's it guys!  You're done!  I bet your chick flick hasn't even ended!


I'd love to see your finished Georgia.  Send me a pic.

Enjoy your sewing....and your movie.

Diane