Wednesday, December 17, 2014

Fabricmart Fabricista - Frankenpattern Dress


Although the mention of Frankenstein conjures up scary images of Igor and bad posture, Franken-patterns are quite different.  Sewists have coined the term to describe combining more than one sewing pattern until a new look materializes.  Ahhh, the joy of creating something new and unique. “It’s Alive!”


It’s time for a winter dress and I’ve been drooling over this fabric for quite some time, both because I love the print and because a double crepe can be difficult to find.  It has a pebble like texture, beautiful drape and “mechanical” stretch, meaning that although it is a woven fabric without lycra, it still has a slight crosswise give.  The stretch makes this fabric easy to sew and even more comfortable to wear.


The print is sophisticated but still really fun and lends itself to a simple style. The skater dress silhouette is quite popular right now and I thought a modified version would be perfect.  There are plenty of skater dress patterns out there but I couldn’t find one suitable for a woven fabric, therefore, I decided a Franken-pattern was in order.  

For the bodice, I used New Look 6144 View B.  I’ve used this pattern before and love the fit.  I cut the pattern 1" above the waistline so the skirt would sit just above the waist and made pleats at the neckline instead of the darts the pattern called for.  


For the skirt, I wanted to dirndl style skirt, not too full, not many seams, so I could make the best use of the print.  I used Simplicity 1354 for the skirt, omitted the pockets and left everything else the same.


What’s a cute dress without a bag to go with it?  Simplicity pattern 1387 was the basis for the shape of the bag, but I changed the handles, closure, hardware and lining to get the bag that I wanted.


The top of the bag is lightbeige twill and black wool suiting makes up the bottom and handle.  To round out the menswear feel of the twill and wool, I lined it in a classic striped shirting and trimmed it with “pleather”.  The pattern doesn’t have any pockets in the lining, so I added a zip pocket on one side and sectioned pockets with bias trim on the other.


I’m so happy with my Franken-pattern dress and my coordinating bag makes me feel like I really have it together.  Thanks Dr. Frankenstein.  And thank you Fabricmart!


Saturday, December 13, 2014

Christmas Sewing

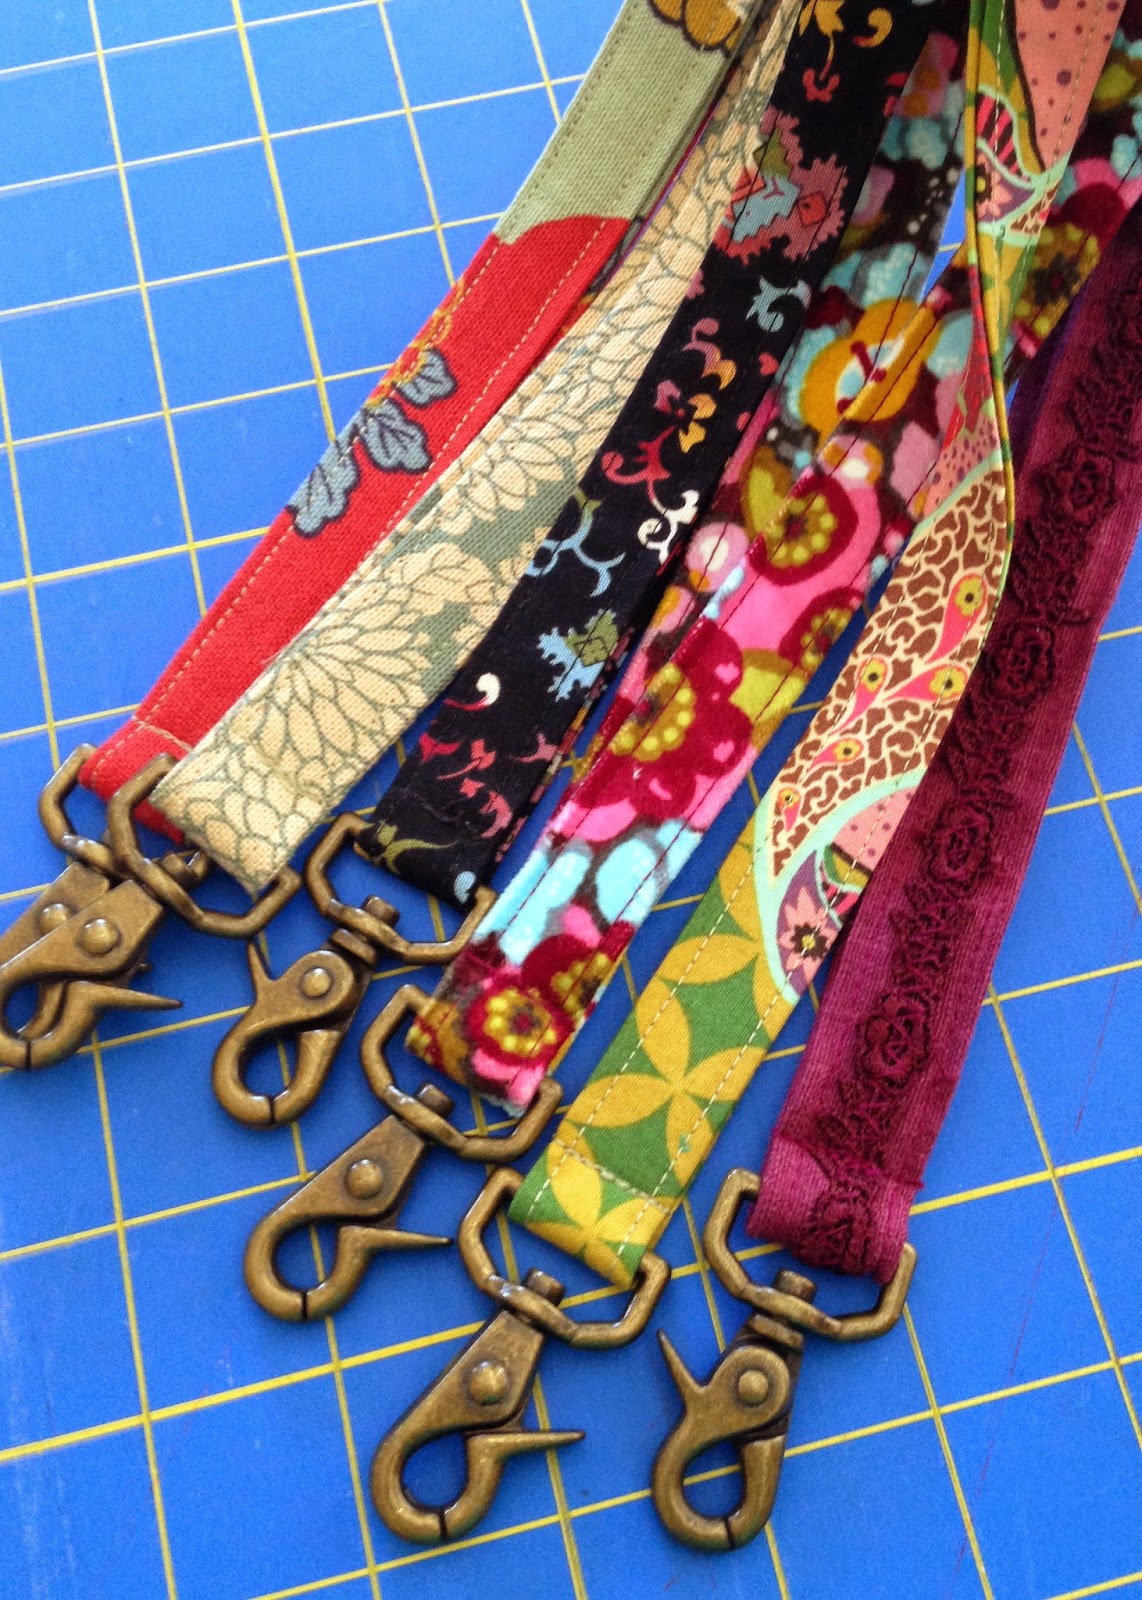
Lots of Christmas sewing going on around here.  Make up bags, journal covers, lanyards, sweatshirts and even a cape for a sweet little girl I know is on the way.

I made this set for my son's (very favorite) teacher:


And I made these for my girlfriends:


More Christmas goods are on the way....

Wednesday, December 3, 2014

"I'm Not a Geek Anymore" Lanyards


Let's face it, lanyards over the years have taken their fair share of verbal abuse enduring "nerd", "dweeb" and "geek" monikers.  There's no need for all this name calling when really all a lanyard is trying to do is help.  Recently, my daughter went away to college and now, along with her classmates, she wears a lanyard most of the day.  I decided it was time to make a handful of cute lanyards, send them to her and her friends and free them from shame.  They are a really simple gift to make and you can use up all of your scraps (notice I use some Anna Maria Horner fabric leftovers, yum)!  So here are the instructions for "I'm Not A Geek Anymore" lanyards:

Supplies:

Swivel clasp lanyard hook (3/4" opening)
3" x 37" piece of fabric
3/4" x 37" piece of fusible interfacing
Thread to match


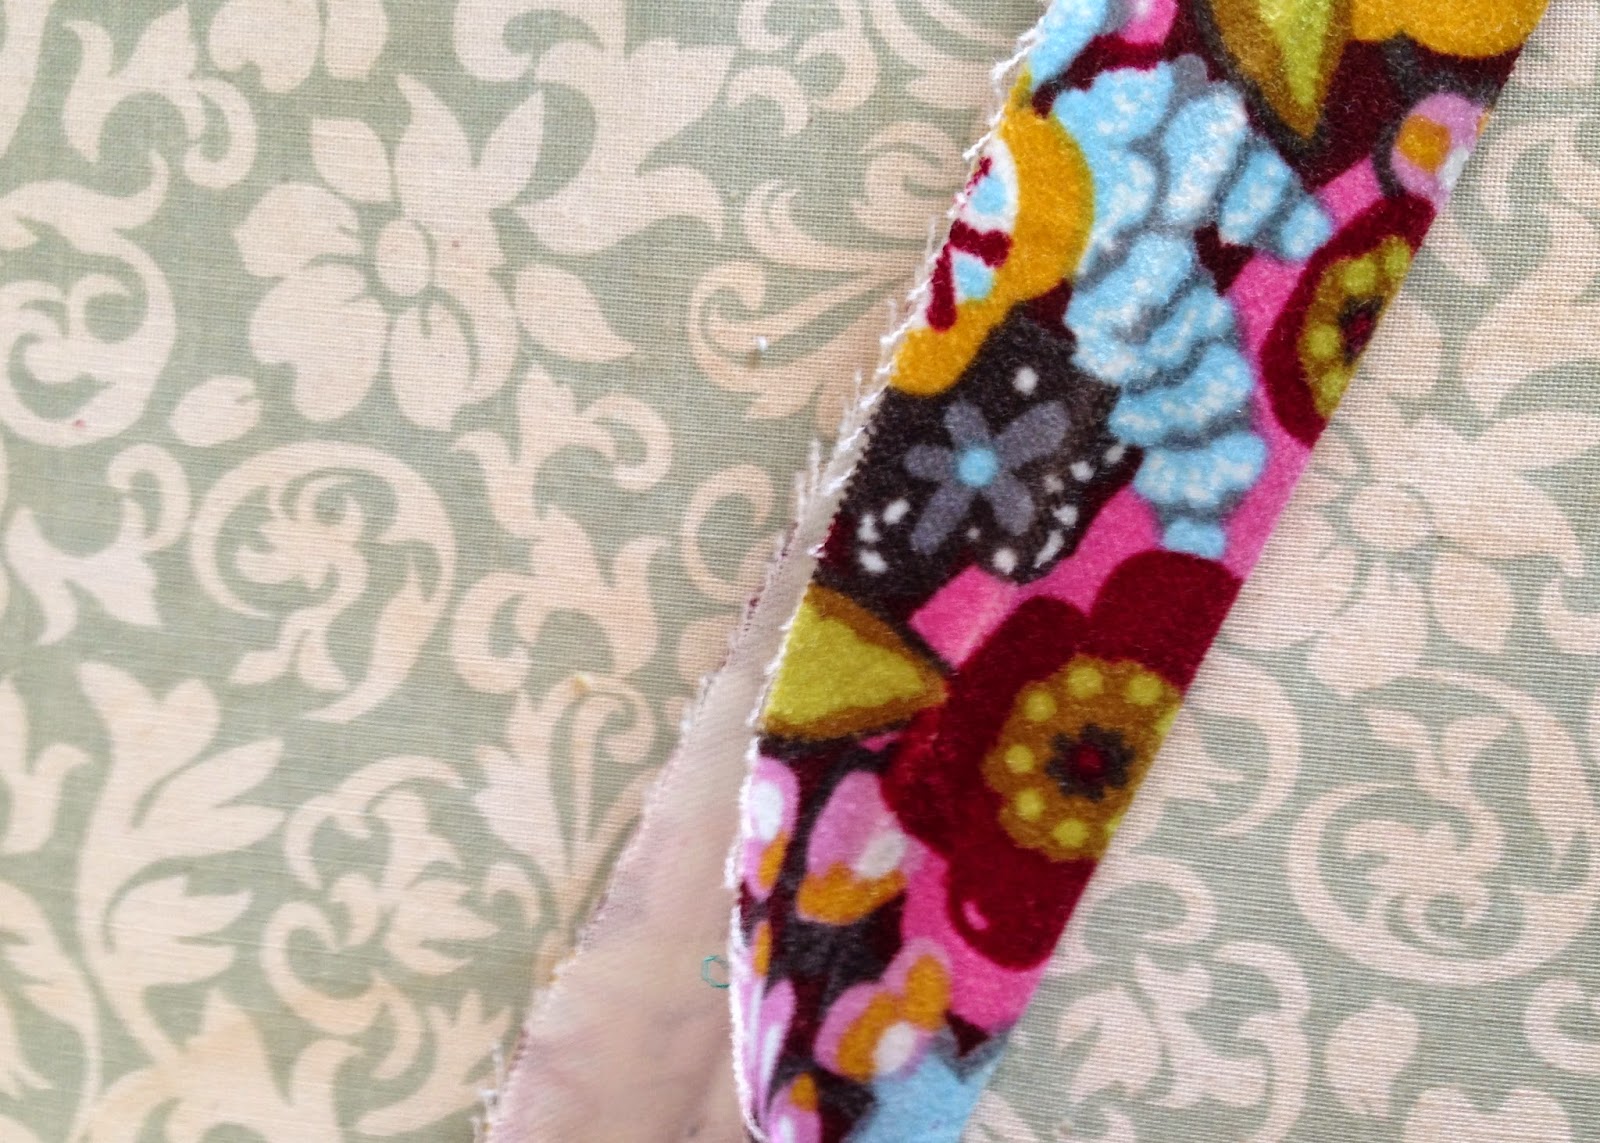
Fold fabric in half in half lengthwise, wrong sides together.  Press.


Open out fabric, fold raw edges in to crease, wrong sides together.  Press.


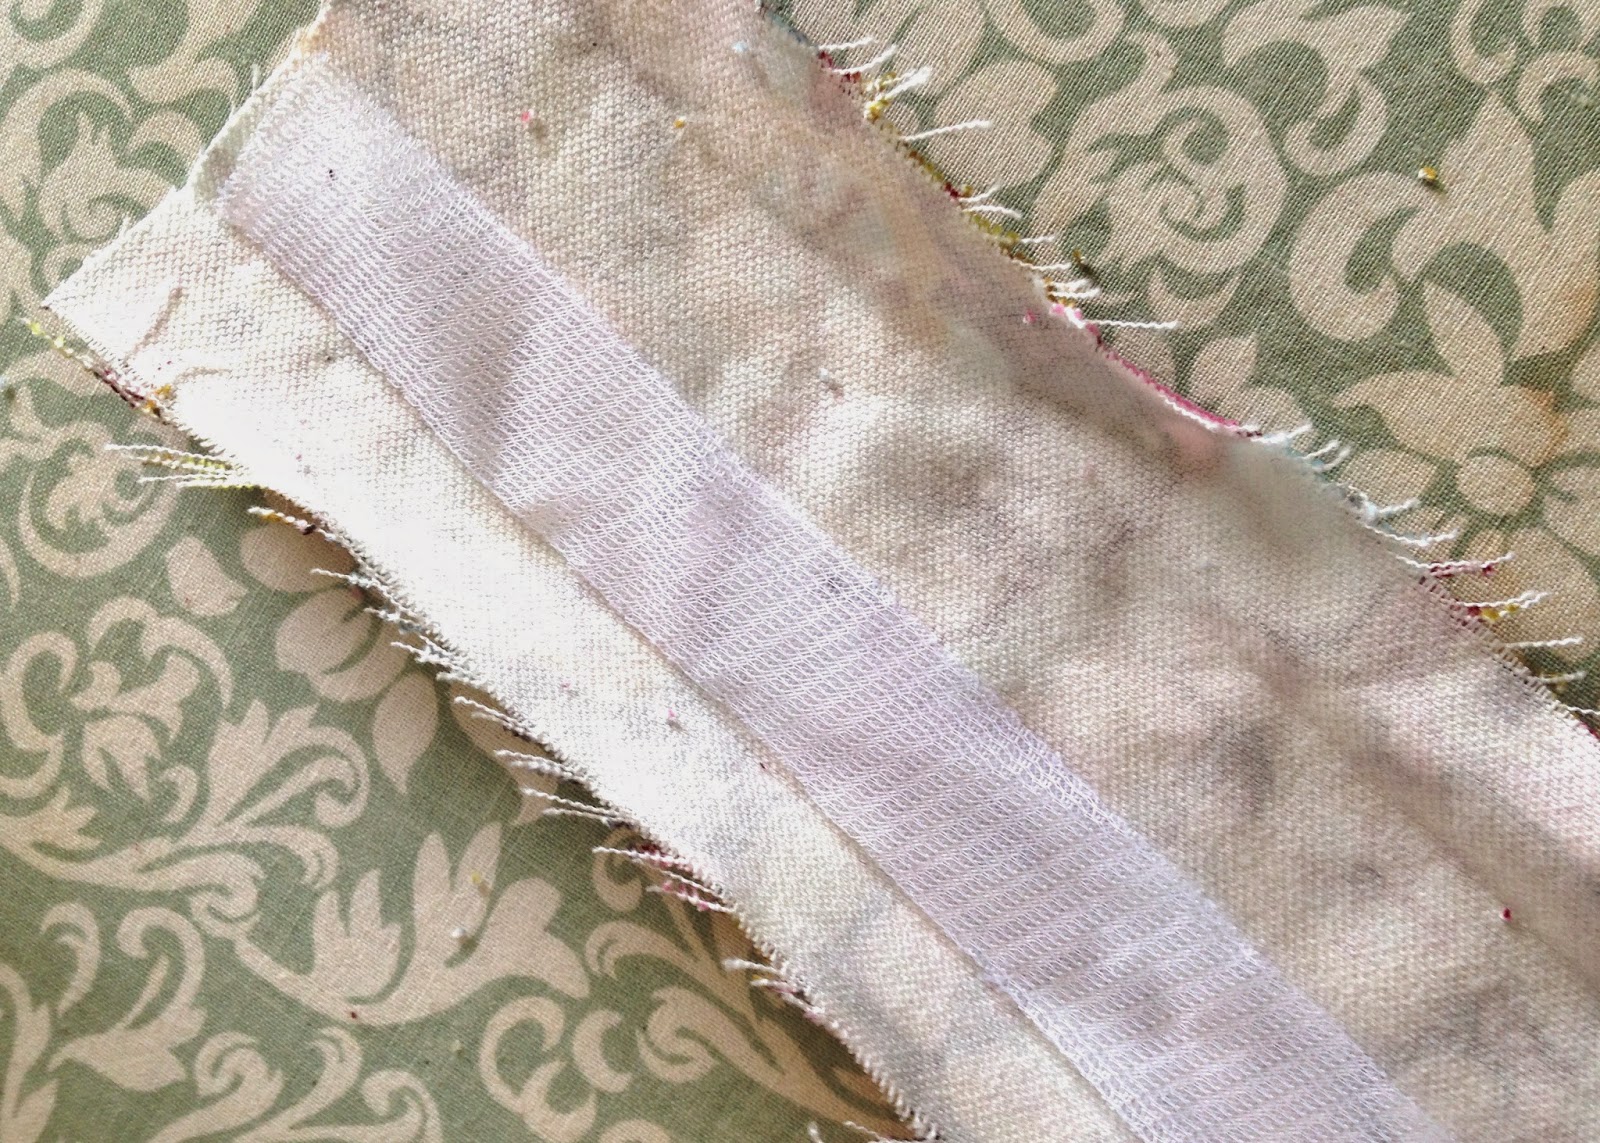
Fold strip along original fold line forming 3/4" strap.  Press.


Place interfacing inside strap along fold line. Press in place.


Push strap through swivel hook.  Open out strap, align short ends of strap with place right sides together.  Stitch, using 1/2" seam allowance.


Close strap along fold lines and pin in place.


Stitch strap closed 1/8" from folded edge.  Repeat stitching on other side.


With zipper foot, stitch across strap close to swivel hook.  


Done!  Yay!  You are now free from "Geekdom"!

Wednesday, November 19, 2014

My First FabricMart Post - Shetalnd Wool "Boden" Skirt

Here is my first blog post as a Fabricista for FabricMart fabrics.  I feel so fortunate to be among all of the other amazing bloggers.  Here it is:

My Pinterest boards, like many of yours, are full of all sorts of “wanna wears” and “wanna makes”.  If you were to look at my boards you might say “This girl likes Boden clothing". Their clothes are classic but fun and their fabrics are never boring, something that speaks to the sewist in me.

Although it’s been unseasonably hot for a while where I live, I’ve been wanting to make something for winter and what better project than a Boden inspired skirt.  And I love this one!  It’s cute, classic, easy to wear and it gives me the opportunity to use wool, one of my favorite fabrics to sew with.

small plaid Shetland wool from Fabricmart in muted violets and purples won out as my fabric choice but I would’ve been happy with this one  or this one too (always the problem...choosing just one).  Shetland is a medium weight springy wool, that’s soft and easy to sew.  It doesn’t fray and when you pin and sew, the fabric pieces want to stay together.

I chose Butterick 4686 View C skirt and made just a few changes.  I shortened the pattern 4” and lined it. I changed the order of construction by attaching yokes to the skirts on both the front and the back, putting the zipper in the back and  finally sewing up the side seams.  That way, I was allowed to make last minute fitting adjustments along the side seams without pulling the yokes apart. 

When working with a medium weight fabric, it's important to reduce bulk wherever possible.  I cut away the seam allowances on the fusible woven yoke interfacing and graded all seams.  Instead of using the outer for the facing (as the pattern called for) I used lining fabric.  It made for a smoother and less bulky yoke.  And any way I can make my middle section “less bulky”, I’ll do it (especially if it doesn’t involve giving up Reese’s peanut butter cups).

There are a hundred tutorials on how to put an invisible zipper in so I don’t need to cover that here, but for this pattern it was important to line up not only the skirt top but also the yoke. 

I sewed one leg of the zipper in, then closed the zipper.  I made a small chalk mark at the yoke seam (see above).  I then pinned the other leg of the zipper, making sure to match the chalk mark to the opposite yoke seam, then I basted it in.  

I checked to make sure everything matched, then sewed it in.  Can’t beat that for matched up seams.

So, my new favorite “Boden” skirt (for a fraction of the price!) is the first winter piece I made this season.  Great way to break the ice, don't you think...so to speak?


Here is my review on PatternReview.com.


Tuesday, November 18, 2014

I'm a FabricMart Fabricista!

Good News!  I'm a FabricMart Fabricista!  The lovely people at Fabricmart have asked me to share my adventures in sewing on their blog once a month.  I'm very excited!  FabricMart fabrics, new projects, more inspiration....what could possibly be better?  Thank you FabricMart!

Saturday, November 1, 2014

Studio Shirt - McCall's 6044

It's been quite some time since I made my husband a shirt.  So long in fact that I can hardly admit it to myself.  When we were first married I made him a few shirts for school and aside from that I haven't made him a proper shirt since.  Plenty of pajama pants and a really great jacket but no shirt.  I'm the worst wife ever.

My husband is an artist and although we live in sunny SoCal, his studio can get cold in the winter.  He wears flannel shirts and light jackets all of the time so it seemed perfect for him to have a handmade one.  I found this really thick plaid flannel that is dreamy soft and pulled McCall's 6044 out of my pattern stash (because I've been saving this pattern to make him a shirt for a while).

View C calls for 2 1/2 yards of 45" fabric for a size large and I purchased 3 yards to accommodate the plaid and shrinkage.  I measured a shirt from his closet that he loves against the pattern and found it was so similar I didn't have to make any changes.

Not surprisingly, one of the most time consuming parts of the shirt was matching the plaids.  I made the shirt in small time increments because I wanted to keep it a secret.  I made the body, the collar, sleeve placket/cuff and front placket all in sewing spurts, so before I knew it I was finished.  It was a great way to work on a project.

This is a good pattern for a first shirt because there's no yoke, a simple sleeve placket but it still has a traditional collar with a stand.

When I gave it to him he loved it and didn't realize I made it.  The best compliment ever!  He wears it on cold days and it's so soft I always want to hug him.  I wish I could get a picture of him in it but a photo of him for my blog is "never going to happen."  But...since I can't have a picture of him I took a picture of one of his yummy paintings to share with you.  Don't tell...


Here's my review on PatternReview.com
Here's my Kollabora.


Friday, October 24, 2014

Bargain Basement


The fabric bargain basement is a dark and twisty place you should not go alone.  That said, I know we all do it.  Me included.  I bought this green fabric in the "flat folds" area of a fabric store not far from here because it's a beautiful color and polka dots are the best.  It's a very lightweight rayon challis and was just $3 per yard and 60" wide.


I used a self drafted pattern and added a knit band to the sleeves.  When I was in college, I made a white woven top with light pink bands and just adored it.  I'm sure I wore it to shreds but I still wish I would've saved it.  This top is my "homage" to that college top.


The tricky part of the top was not the construction but the fabric.  When I got it home and started to lay it out I realized the pattern was printed off grain.  Not just off grain but OFF GRAIN.  Now I know why it landed in the bargain basement!

In the photo above, I cut the fabric on the crosswise grainline but if you look closely, the design and circles aren't straight.  This piece of fabric is 10" wide and the design is 3/4" off.  So on 60" wide fabric the design is almost 5" off crosswise. Yikes!

So...what does that mean?  Well, my top is on grain and lays straight but the print isn't.  It's subtle but it's there.  Thankfully the pattern has dots all over so it almost hides itself.


I still love it.  I still wear it.  It's dreamy soft and I love my "woven" sweatshirt.  Mistakes and all.  It'll be our little secret.


<a href="http://www.bloglovin.com/blog/5222481/?claim=bbsm3e5fnht">Follow my blog with Bloglovin</a>

Thursday, October 16, 2014

Purple People Sweater - McCall's 6796


As some of you know, purple makes me happy so when I found this lovely sweater knit I knew I had to get it.  I've had it for a couple of months but that weather has been unusually hot and the thought of making a sweater was more than I could tackle.  But, we got a little respite (we are only in the 80's now) and I took the opportunity.


I've had this McCall's 6796 for at least a year and with the perfect fabric finally in hand I dug right in.  This loose weave sweater knit from Fabricmart fabrics is soft and really feels like a knit sweater.  Because it's a knit I found that the easiest way to mark the pieces was with tailor tacks.  Now I know to some, tailor tacks are laborious but they went fast on the loose weave and for sure it was faster than trying to find my fabric pen, which wouldn't have worked anyway.  I serged all of the seams which is normal construction for me but it really was necessary to keep all the threads together.  


After cutting, it took less than an hour and a half to construct (fast and fun) and I made three small changes on a size 12 during construction.  I shorted the sleeve 1 1/2",cut the hem 3 1/2" and put on the collar different than the instructions.  I sewed right side of the collar to wrong side of bodice therefore the seam allowance would be hidden under the collar when it was folded in place and not show.  The most difficult thing about the entire project was choosing buttons.  I have an extensive collection of vintage buttons and I easily spent 15 minutes of that hour and a half choosing.


Hmmm.....which to choose.....


After all that I went with a large white vintage plastic button.  But that's not to say I won't change my mind later.  I only takes a minute to change a button.  And....I went with a skin color cami underneath but I think I'll look for a purple one instead.

The wind was really blowing that day!  Nice hair!


A purple people eater to make your day!


Here are links to my pattern review and kollabora.